Gingrich Piano Studio is now offering online lessons! I am excited to serve students from the other side of the city and the continent.
How to Get Started With Online Lessons
1) Let me know if you’re interested! (New students, I’ll let you know where to buy the right books.)
2) Prepare to communicate about lesson assignments. I’ll type your assignments into a Google Docs file that we’ll share. Then I’ll update that same file each week, so your assignments will always be in the same place. Or, if you prefer, I can email assignments. If you have already been taking lessons with me, email me a photo or a typed note of the most recent weekly assignments in your student note book. Here’s my email: [email protected] (Please don’t text photos to me.)
3) Get your audio-video technology ready. A laptop with a built-in webcam may be all you need. A tablet paired with a smart phone or a plug-in webcam can also work well. (A smart phone alone is not ideal, because the student will not be able to see me clearly on the small screen.) See below for more help, including photos.
4) Play with Zoom if you wish, but it is very easy to use. If your internet signal is dependable for watching videos, we should have no problem. I’ll email you a link just before each lesson starts, you’ll click the link, and that’s about it. If you are new to Zoom and want to see some of it’s features, you may watch this video. (To improve our safety and security on Zoom, I am following the tips in this helpful article.)
5) We’ll choose lesson times that work well for both of us. Existing students: Since it will take me a few minutes to transition between each Zoom session, our old schedules will need to be modified somewhat.
6) Plan to have an adult present for the lesson time, at least as we get started with our first session, which might involve some trial and error.
That’s it! Online lessons will never replace face-to-face lessons (I’m already missing our duets!), but I’m eager to keep learning music together.
How to Set Up Technology for Piano Lessons Online
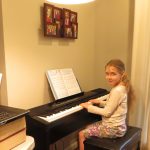
A BASIC SETUP: Here is an example of a basic student setup, using only a laptop with a built-in webcam and microphone.
Here are some pros and cons of this setup.
Pros:
- Camera position. The webcam is at a good height and angled downward toward the student and keyboard. In this example, the laptop is sitting about 35 inches above the floor, resting on a folding table and two large dictionaries. This puts the camera at about 45 inches above the floor. UPDATE: A little higher and a little more angled toward the keyboard–like the perspective of the photographer who took the photo above–would be even better.
- Good overhead lighting. A large floor lamp (seen in photo) and overhead ceiling lights (not shown) brighten the scene so that the camera can get a good image.
Cons:
- Too much backlighting. The window behind the student is not ideal. In this case, depending on time of day, pulling the drapes will solve the problem.
- No overhead camera. An overhead camera can help the teacher see the student’s hands better.
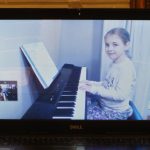
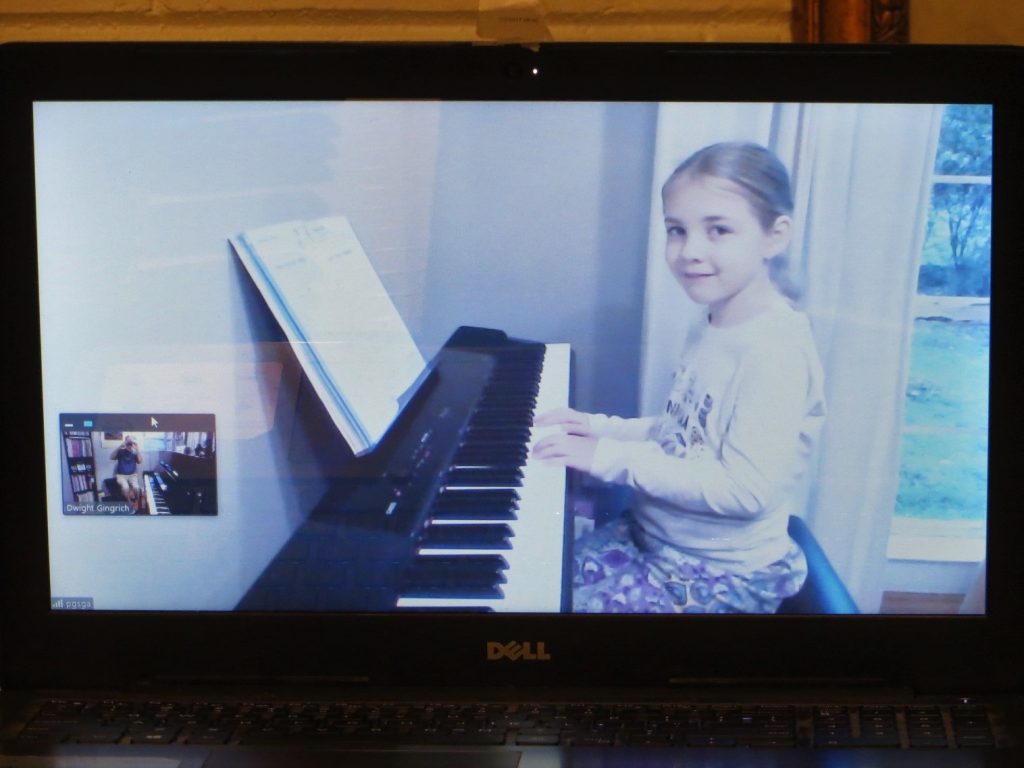
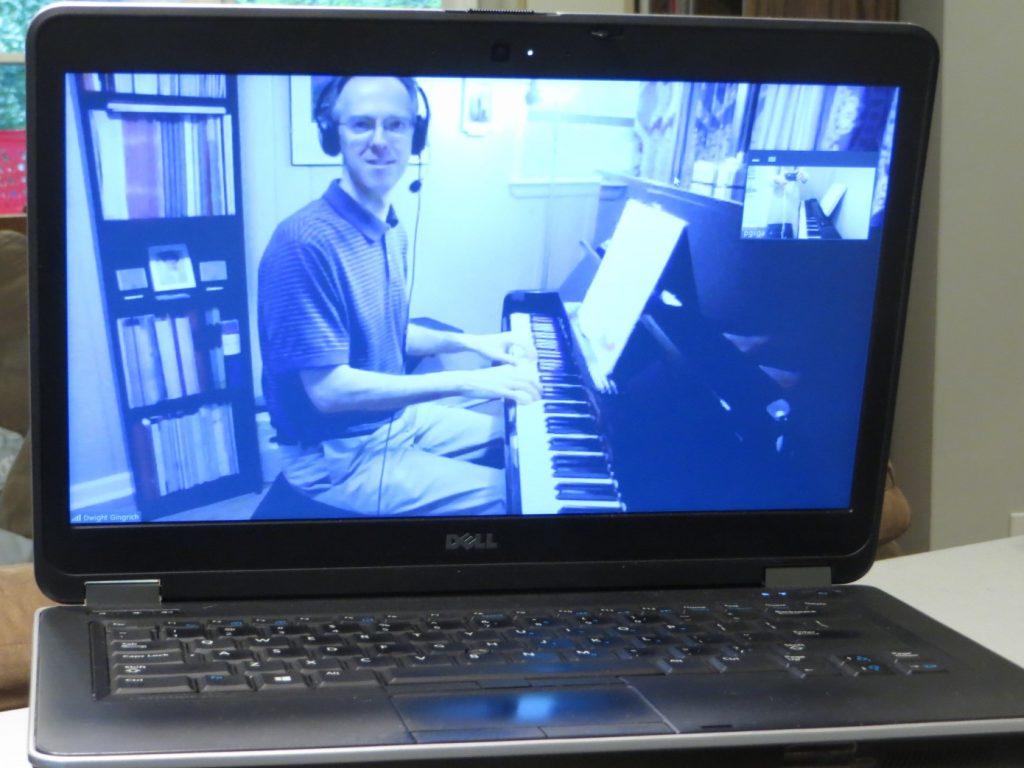
Here is what the teacher will see with this setup . (The color should be better in real life; my camera does not take good photos of computer screens.)
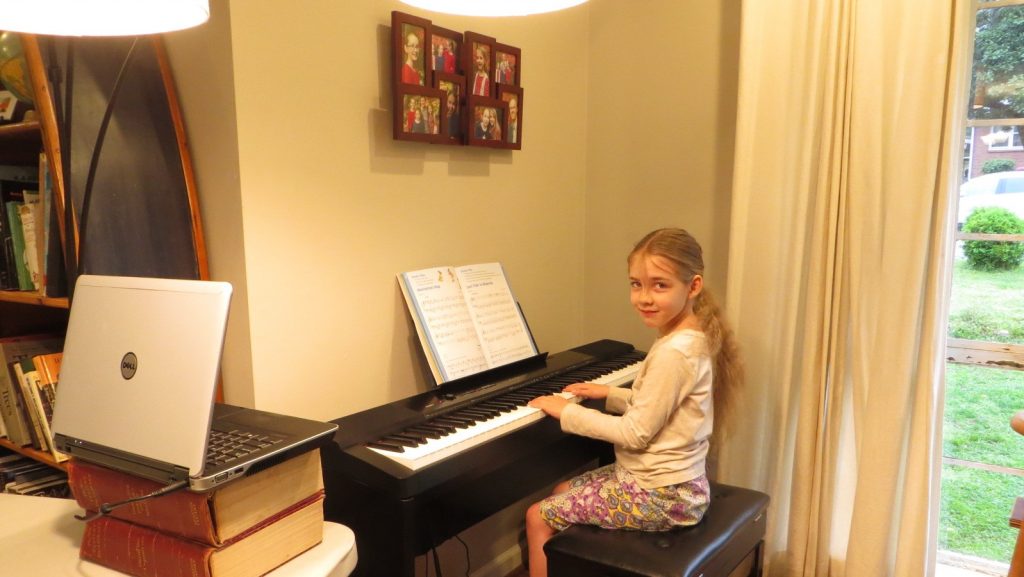
There are several easy variations to this basic setup. A tablet paired with a smart phone will also work well, as in the next photo. (In this case the student would log onto Zoom separately with both devices.) One of my students who has an upright piano has even propped a cell phone on top of the piano facing directly down on the keys, giving me a perfect top-down view of the student’s hands.
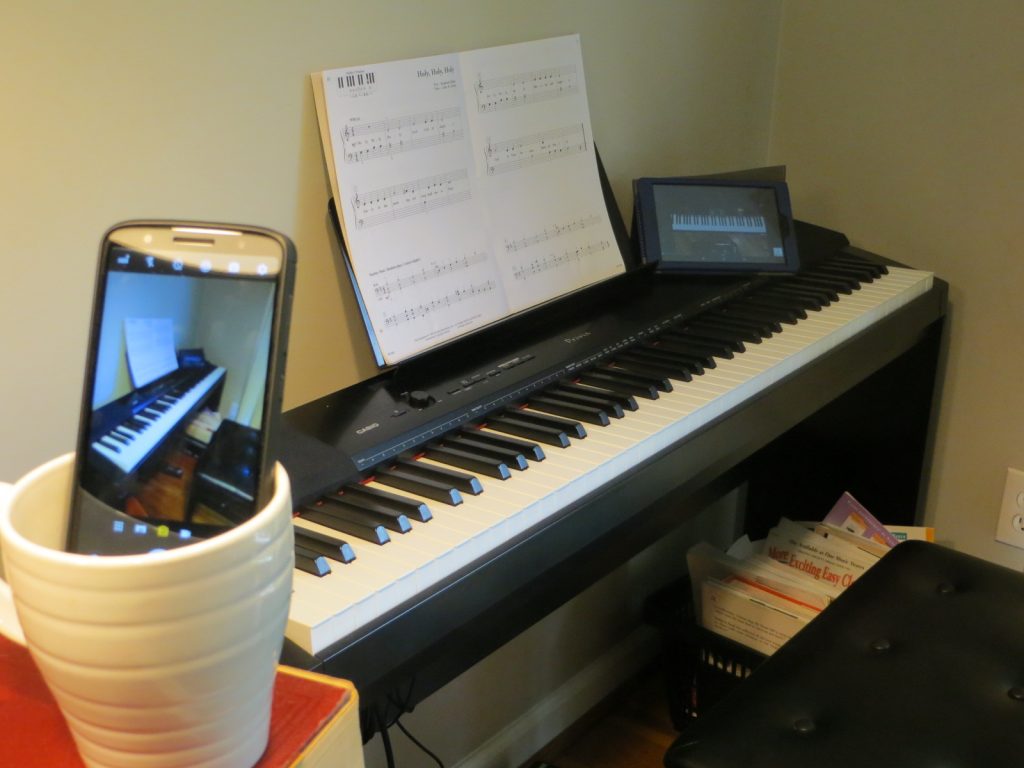
A large tablet paired with a plug-in webcam will also work well. A large tablet alone might also work, as long as it can be propped up safely at the right angle so it can both “see” the student and be seen by the student at the same time. A smart phone alone is not ideal for the student because of its small screen size, but it could be used initially to experiment.
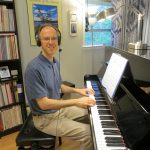
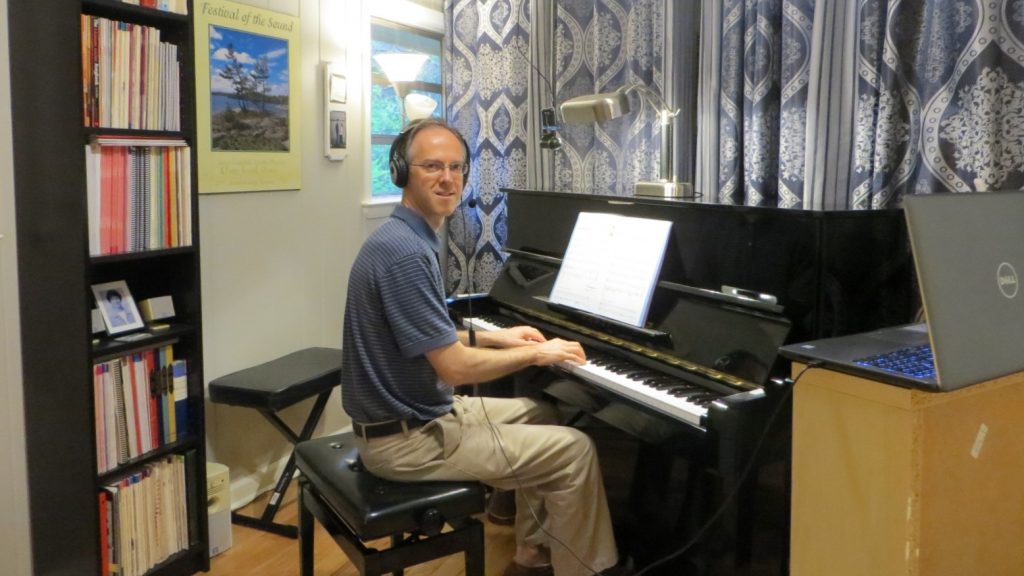
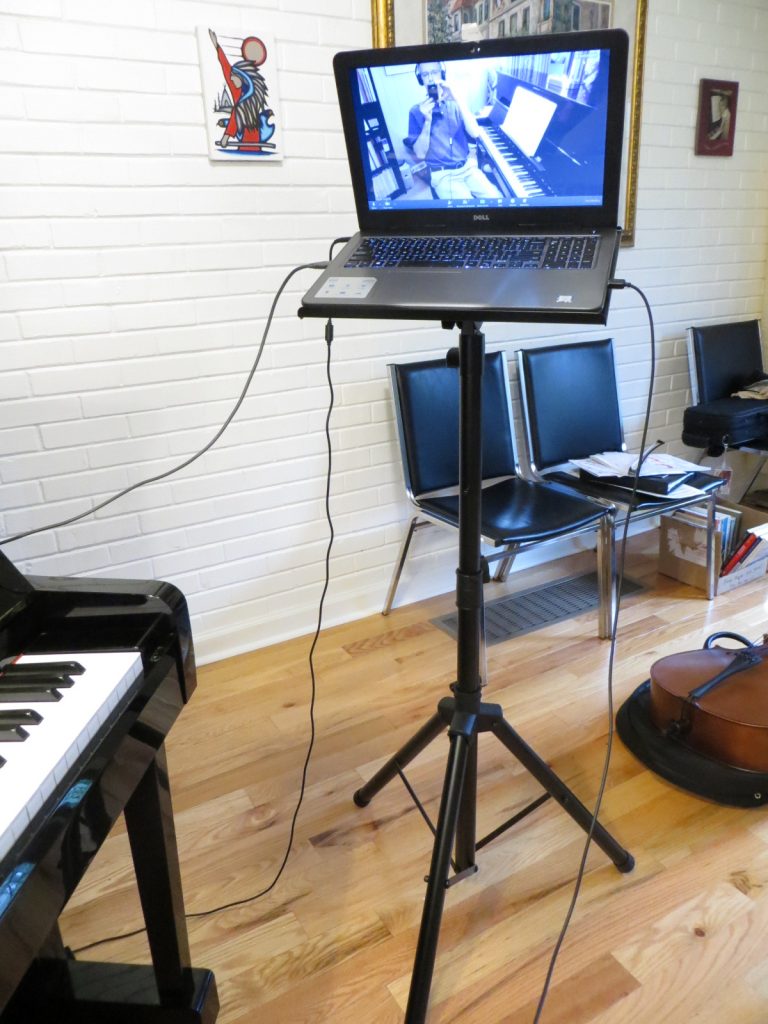
A BETTER SETUP: A basic setup should work fine for piano lessons, but there are some simple ways to take your setup to the next level. Here is what my setup looks like.
Here are some pros and cons of this setup.
Pros:
- Two camera angles. This setup uses both a laptop webcam and an overhead USB webcam, placed about a foot in front of my head. This will allow students to watch my hands more closely. A smart phone could probably be used in place of the overhead webcam. It’s easy to switch between cameras with Zoom. (I am using a good laptop stand, but was temporarily using a random piece of furniture for the photo above.)
- Slightly better audio. My headphones allow me to hear a student better than I would through my laptop speakers, and the microphone built into the headset records a higher quality audio, making it easier for the student to hear me and my piano.
Cons:
- No view of pedals. The ultimate setup would have at least one more camera, aimed at the piano pedals.
- Audio could be improved. A better setup would have a quality stand-alone USB microphone. I suspect that much of the time, however, the quality of signal over Zoom will be a bigger factor determining audio quality.
- Backlighting. I will need to install a blind on that window to use on sunny days. (The lamps in the background should be high enough to stay off camera most of the time–see photo below.)
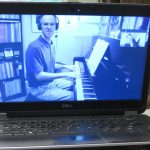
Here is what a student will see when I use my overhead camera:
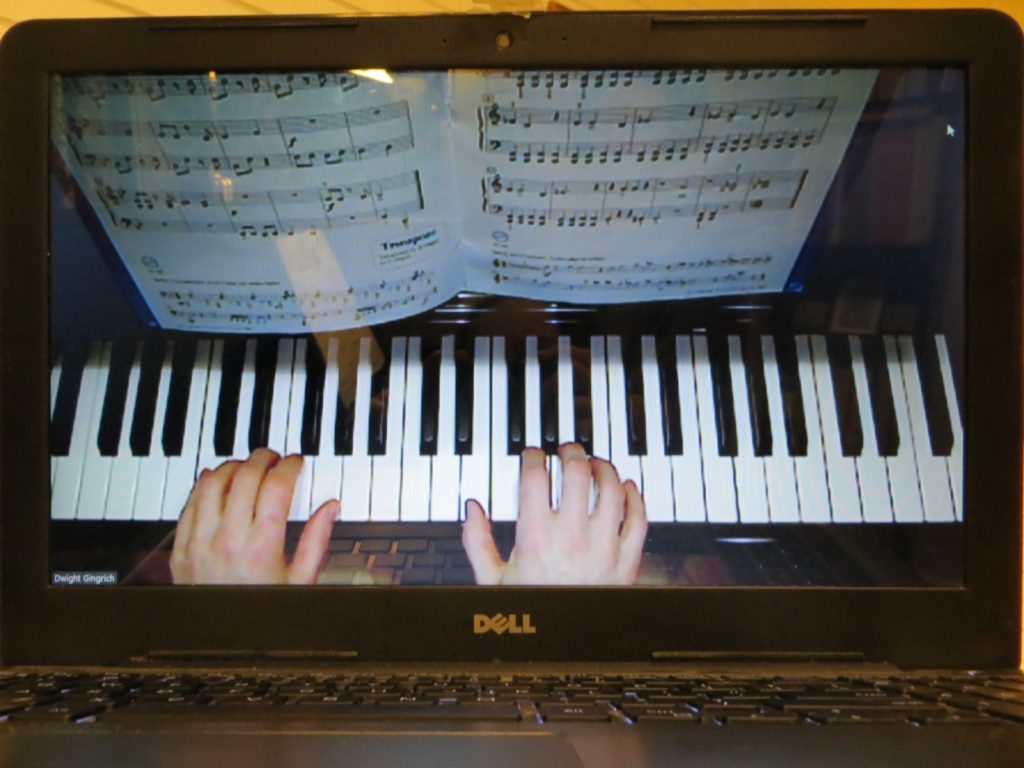
Here is what a student will see when I use my laptop camera:
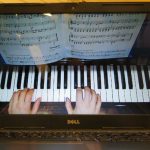
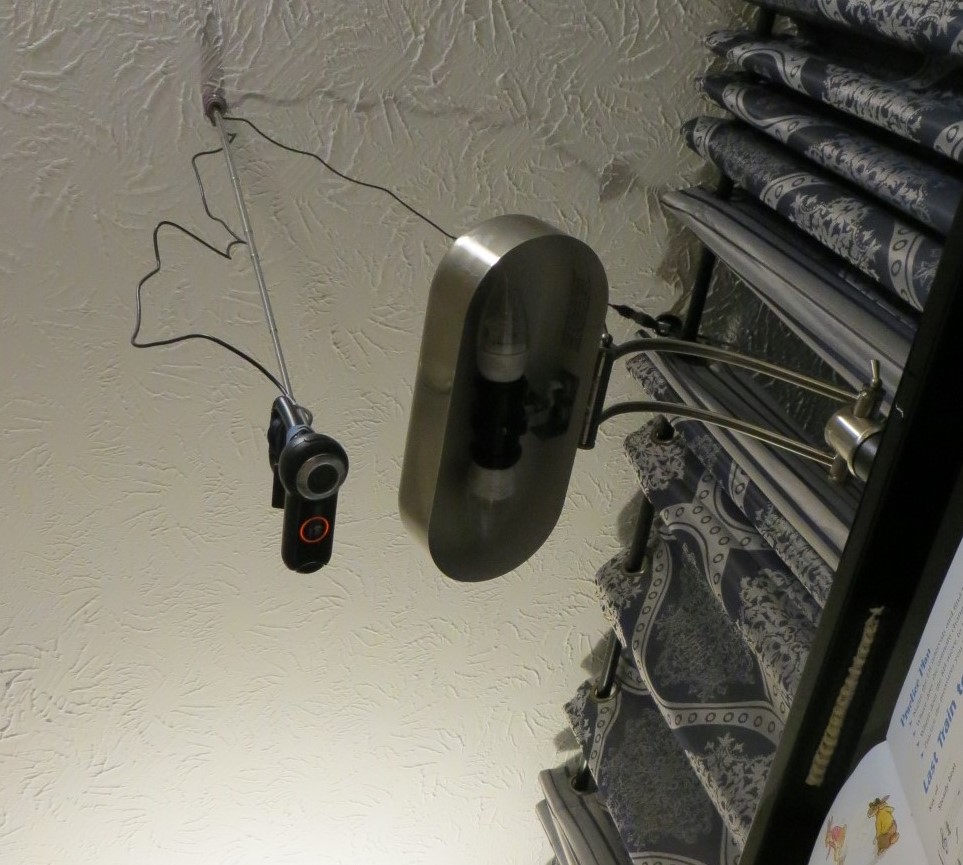
Here is a close-up of my overhead camera setup. It’s cheap and practical. I used a telescoping hot dog roasting stick, fastening the handle end to the ceiling and the other end to my camera. Now I can move my camera up and down easily during lessons, for a “zoom” effect. And I can retract it to within a foot of the ceiling when I don’t need it. Hopefully I can tidy up the cord yet to make the setup more attractive.
And here’s a photo of my laptop stand, which allows me to position my laptop a little higher (camera at 56 inches above the floor) and more securely. Note also how it is positioned a little more “behind” the pianist in this image, giving the camera a better angle on the keys.
That’s it! Hopefully with these tips we can begin online lessons. As we learn more helpful hints, I can add them here.